
All cooking enthusiasts would know the eagerness to cook a mouthwatering meal in a newly purchased smoker. Contrary to popular belief, a smoker needs seasoning as much as a cast-iron skillet would. Electric smokers are designed for extra convenience and easy cooking. However, it is rare for these digital smokers to come pre-seasoned. This might bum some chefs out because they cannot start working their magic with a new smoker right away, but hold on! Learning how to season a smoker may seem like an extra job that delays cooking, but it also results in a delayed gratification that is so much better!
Some beginners may not realize the importance of seasoning a smoker before using it, which is why we are here. This guide will help you understand why you must season your electric smoker and lead you with a step-by-step instructions. So, let’s jump right in!
Seasoning, also known as pre-seasoning or curing, may seem like a trivial extra step. It is a crucial procedure to ensure exquisite tasting meals every time! Seasoning is a simple task that involves coating the insides of your smoker with a protective layer that keeps the food you cook from touching the surface of the smoker. Unlike a cast iron, the purpose of seasoning a smoker is not to keep the surface from sticking, but it is still a necessary procedure. There are two major reasons as to why you must season a smoker before using it for preparing meals.
One of the main reasons for seasoning a new smoker is to rid the cooking surface of any contaminants and thoroughly cleaning the smoker before use. Seasoning removes any leftover impurities and residue dust, water, or oil particles. You might assume that a new smoker is clean and free of residue.
Some particles, such as uncured paint and other solvents from manufacturing, interfere with the cooking process and affect the taste and smell of the food you cook. Petroleum-based residue particles from manufacturing can be toxic and prove dangerous. Therefore, it is important to rinse and wipe your smoker before seasoning.
Another purpose of seasoning your smoker is to make it last longer by adding a protective layer that prevents rust. The manufacturing process does not include rust prevention, and thus the task of rustproofing the smoker falls on you. Seasoning ensures the removal of any leftover coatings of paint inside your smoker that can potentially lead to early rusting. It also keeps the surface safe from food and water particles that can seep in and encourage rusting of the metal, thereby making your smoker last longer.
A bonus to seasoning your smoker is the mouthwatering taste it brings out. Many chefs swear by the fact that the secret to a perfectly smoky-tasting steak is using an old smoker and cleaning your cooking pans without soap and water because the buildup of a layer of previous cooking adds to the taste. Seasoning involves heating your smoker, which causes a thin layer of black smoke to cover the inner surface of your smoker. This layer results in a delicious smoky flavor in the food you prepare.
There are several ways to season a newly purchased smoker. The seasoning method largely relies on the type of smoker you own. Continue reading to find out the best way to season a new electric smoker.
It is essential to read the instructions guide that comes with your electric smoker carefully to find the best way to assemble and cure your new smoker before commencing the cooking. Refer to the video below for a visual guide of seasoning a new electric smoker.
An important thing to consider before starting the seasoning process is to assemble the new electric smoker properly. This is crucial because a poorly assembled smoker will not perform well and can be potentially hazardous.
You must wipe your new smoker clean, using a clean and damp dishcloth or a damp sponge, and dishwashing soap. Gently wipe the interior walls, base as well as the smoker accessories, like trays, grates, and racks. Harsh scrubbing is not recommended because it may cause nasty scratches and scrapes in the paint. Once you are done cleaning the smoker, rinse out the soap with warm water and leave it to dry. You use a dishcloth or paper towels to get rid of the larger water particles before leaving the smoker open for air-drying.

Once your clean electric smoker is completely free of moisture, you can start the actual seasoning process. You can use a cooking oil spray to grease the insides of your smoker. If you are opting for alternative oil, take the oil of your choice, pour some on a clean dishtowel, and wipe down the interior walls of your smoker for a smooth and even layer of grease.
Make sure that you don’t use excessive oil because oil droplets can harden during seasoning and remain locked in the seasoned layer in the form of nasty bumps. A light oil coating is perfect to start. Accessories, like the grease tray and water tray, don’t require oiling.
After you grease the smoker with a thin coating of oil, place the trays and other accessories back in the smoker. If you are seasoning an electric smoker, there is no need to fill the water tray.
This is the first time that you will start your electric smoker. Make sure to use a safe connection. We recommend avoiding the use of an extension cord. In case you need an extension cord for connection, be careful to use a heavy-duty cord with an earth pin to avoid a short circuit.
Keep the vent open when you are seasoning
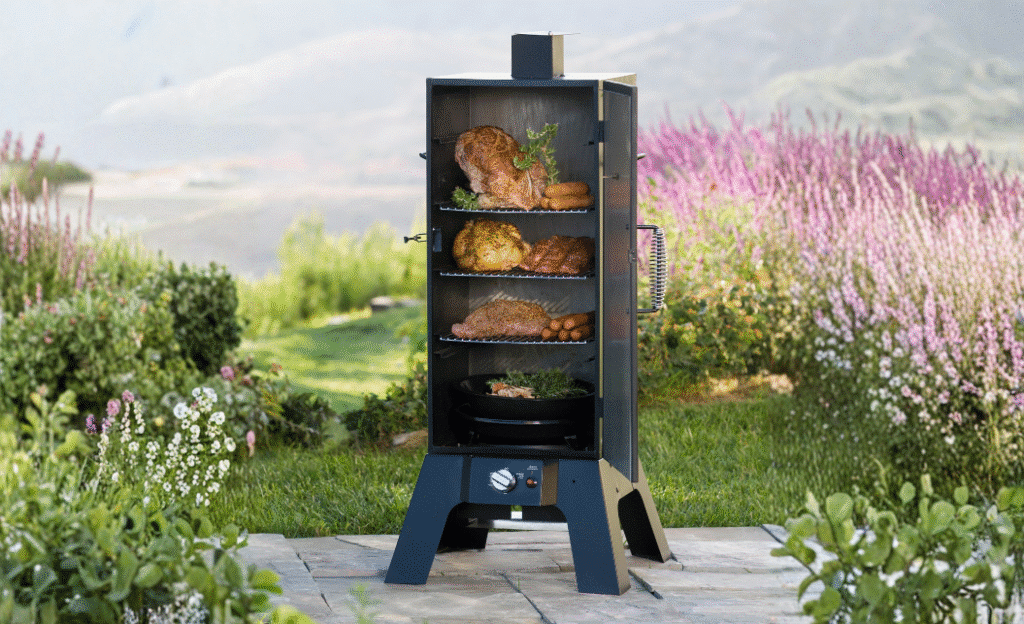
Once you switch the smoker on and open the top vent, set the smoker to its maximum temperature. For instance, our recommended pick, the Masterbuilt MB20071117, has a max temperature of 257°F. Now set the timer for 3 hours and let the smoker season.
You must keep adding woodchips to the loader according to the following time intervals:
Turn off the smoker after the 3 hours on the timer are completed. Viola! You have a perfectly seasoned smoker that is ready for use.
To make the seasoning process more fun and personalized, you can incorporate the following variations.

Seasoning requires an oil or similar lubricant that has a high burning point. Considering that the seasoning process involves long heating at a high temperature, oils with lower burning points tend to be extremely inconvenient because they burn faster, producing excessive smoke. This smoke can cause irritation in the eyes and affect smooth breathing as well.
Oils most recommended
Trusted Source
How To Season A Smoker In 3 Easy Steps - Rural Living Today
Learning how to season a smoker can help you to prepare your appliance for its first use. It’s also a fantastic way to ensure you maintain it regularly to preserve its integrity.
In this guide, we explore the best ways to season your smoker in just three easy steps, as well as a few tips and tricks for doing it correctly.
rurallivingtoday.com
for seasoning include cooking oils like canola or oil grapeseed oil.
If you don’t have canola oil, or if you like to experiment with other substitutes for personalized flavors, you can use hot burning grease like high-temperature palm and sunflower oil, bacon oil, suet and other types of seed oils, like soybean and corn oil.
Whenever you read articles on pre-seasoning or curing a smoker, the sole motivator is that it is a one-time procedure. Initial seasoning of a smoker tends to last for a long time, but you may need re-seasoning eventually. Re-seasoning Trusted Source How to Season Or Cure your New Smoker in 7 Easy Steps - FoodFireFriends Over time you may get a build-up of charcoal or grease on the interior walls, or a spill may occur. When this happens, treat your smoker like new and go through the wash, dry, and oil process again. www.foodfirefriends.com is vital to ensure rust prevention because, over time, your smoker needs a fresh layer of smoke. After several uses, you may experience the buildup of sticky grease or charcoal from smoke on the insides of your smoker. This is known as creosote, a thick layer of grease leftover from previous cooking.
Spills during cooking can also leave particles behind despite wiping, which can encourage rusting. This calls for a thorough cleanup involving soap, water, and gentle scrubbing. After cleaning the smoker, dry it properly using paper towels. Once you achieve a clean and dry smoker, repeat the seasoning steps you followed the first time and enjoy a brand new smoker that maintains its excellent performance.
Congratulations! Your brand new electric smoker is perfectly seasoned and ready to use! Get ready for a long-term relationship with your new favorite smoker that promises you a lifetime of deliciously cooked and perfectly smoky meals.
You will thank us later for encouraging you to learn how to season your smoker. The few tiring hours you just spent curing your smoker will help keep the rust away and ensure safe and tasty meals. The seasoned layer will not only make your smoker stay functional for long years but also help you prepare meals that will have guests begging for your secret ingredient!
We love learning new and exciting ways to go about otherwise boring procedures. Feel free to share your personal seasoning techniques with us!